I will describe on this page how to set up and
use the OneWinch launching system created and marketed by
GessWork.
Full Disclosure: Tim Gess, the man behind the OneWinch, has been my very good friend since our freshman year of high school. We also attended 4 years of college together - and he was one of my groomsmen at my wedding.
Tim sent me a prototype of the OneWinch for free several years ago, but due to the lack of a flyable airplane, I have just recently been able to use the system.

So these are the basic components of the system:
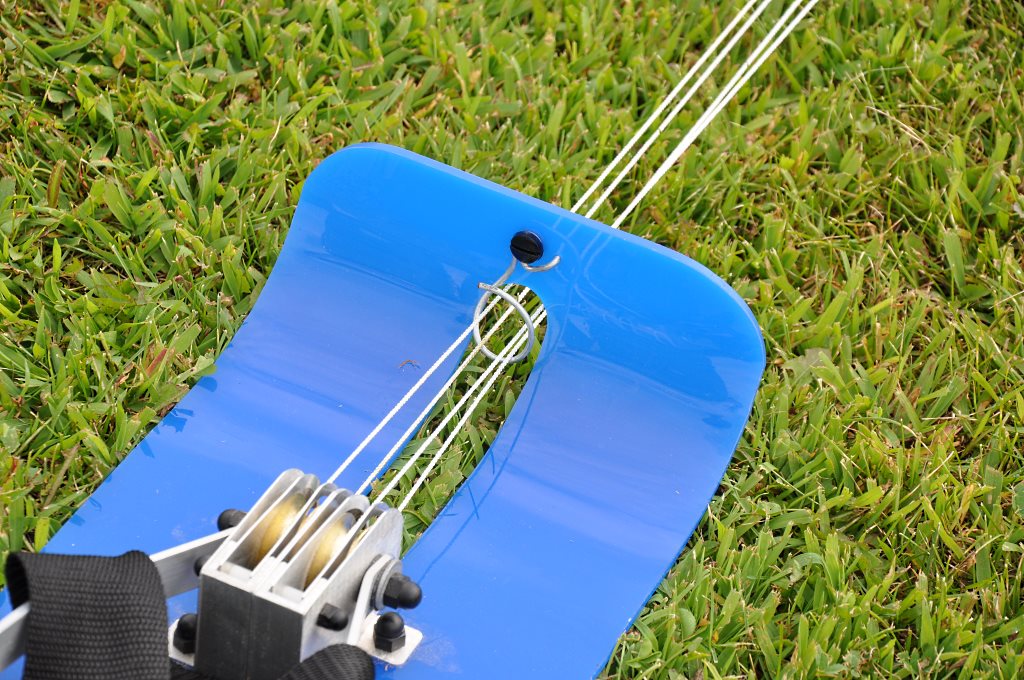
Ground Pulley - with stakes
Turnaround Pulley - with stakes
Sled - with belt
Spool containing braided line under monofilament line
Parachute
Not pictured are a power drill adapter and a manual.
Ground Pulley - with stakes
Turnaround Pulley - with stakes
Sled - with belt
Spool containing braided line under monofilament line
Parachute
Not pictured are a power drill adapter and a manual.
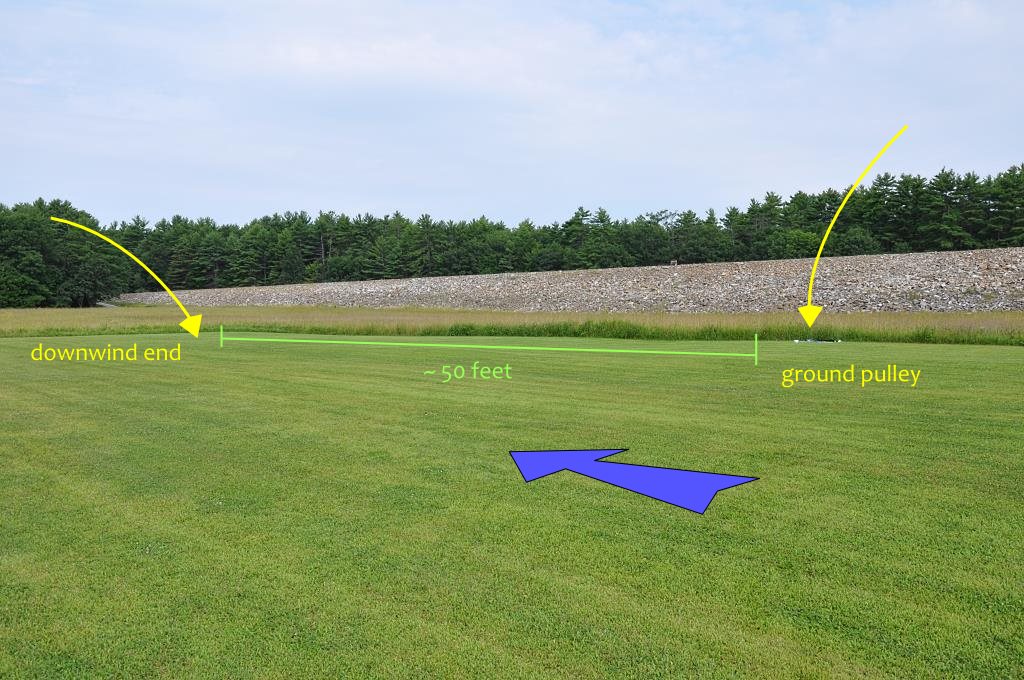
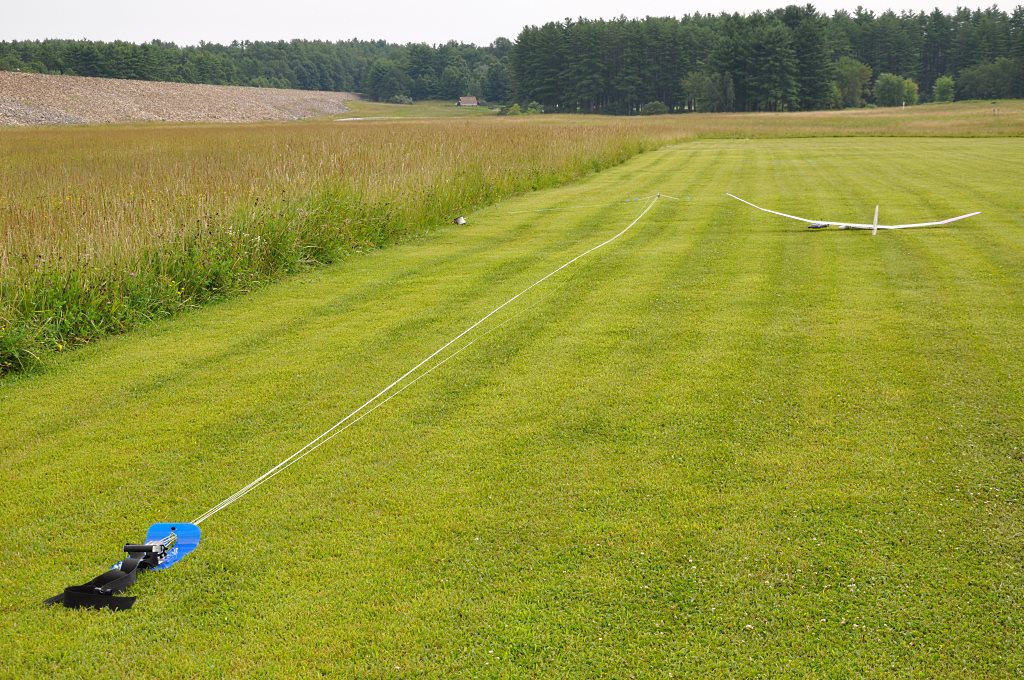
To set up the OneWinch, carry the components
pictured above to a spot roughly 50 feet from the downwind end of
your field.
During launching, you will be walking backward over the area that has the green line in this picture.
A flat surface, clear of obstructions is helpful since you don't want to trip as you walk backwards during launch.
During launching, you will be walking backward over the area that has the green line in this picture.
A flat surface, clear of obstructions is helpful since you don't want to trip as you walk backwards during launch.
Stake the Ground Pulley roughly 50 feet from the
downwind end of your field.
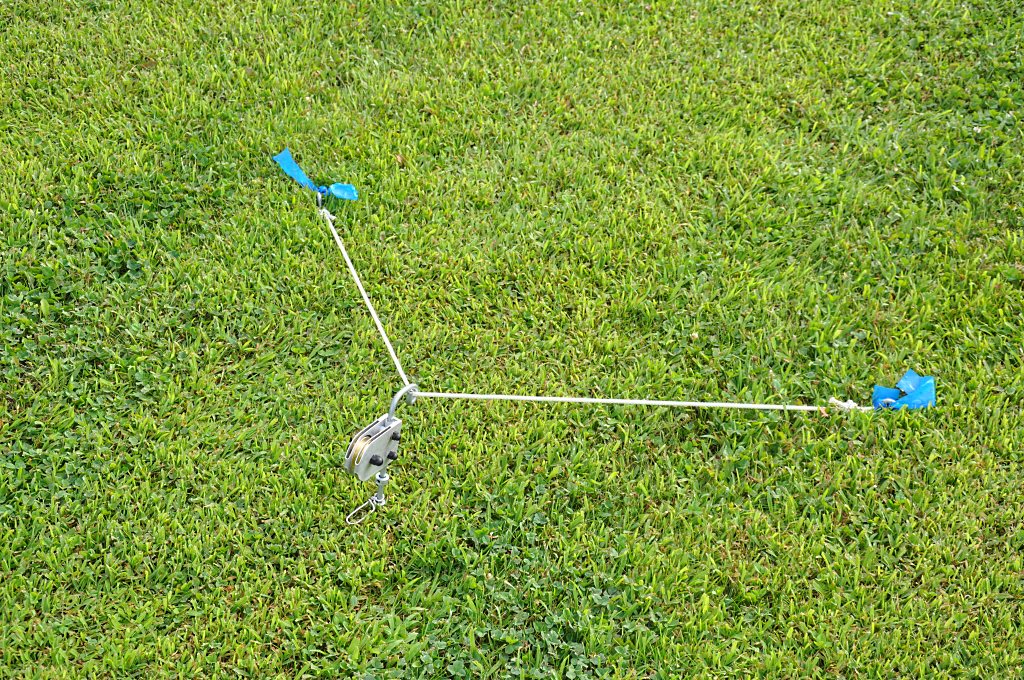
Stake the safety rope securely to the ground with the two stakes provided.
Edit: After I took this picture I discovered that I've been setting the safety ropes too far apart. The rope should make about a 60 degree angle - not a 90 like I show here... I'll update the picture in a few days...
Stake the safety rope securely to the ground with the two stakes provided.
Edit: After I took this picture I discovered that I've been setting the safety ropes too far apart. The rope should make about a 60 degree angle - not a 90 like I show here... I'll update the picture in a few days...

Set the reel on its mounting stake next to ground
pulley.
It helps to angle the stake so that one edge of the reel rubs on the ground. This bit of friction prevents the reel from freewheeling and allowing the line to go slack as you unwind the line.
Edit: In these pictures, I have the reel next to the ground pulley, but it will actually work better to have it behind the ground pulley in the "walk back" zone. That way, once the line is completely unwound, you will have enough line left over to thread through the sled and ground pulley. - I'll try to update these pictures to reflect this...

Pull the end of the monofilament from the reel
and pass it up through the Turnaround Pulley. (bottom to top)
Attatch the line to the parachute and then hook the parachute ring to the clip on the Ground Pulley.
Attatch the line to the parachute and then hook the parachute ring to the clip on the Ground Pulley.

Now walk the Turnaround Pulley down to the far
upwind end of the field.
As you walk, the line will be unspooling from the reel.
Stake the Turnaround Pulley in the ground in the same manner as you staked the Ground Pulley.
The monofilament and braided line should now be completely unspooled from the reel.
As you walk, the line will be unspooling from the reel.
Stake the Turnaround Pulley in the ground in the same manner as you staked the Ground Pulley.
The monofilament and braided line should now be completely unspooled from the reel.

Return to the launch area and pass the end of the
braided line through one of the pulleys on the sled.
Pass from top to bottom over the pulley wheel.
Pass from top to bottom over the pulley wheel.
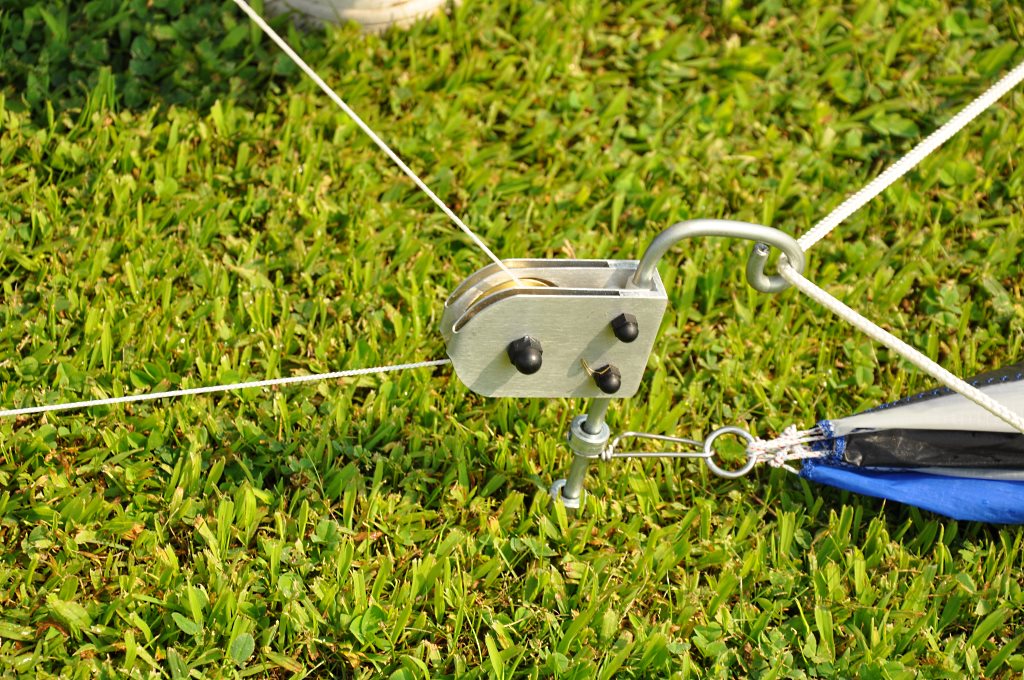
Pass the end of the braided line through the
Ground Pulley (bottom to top) and back to the second wheel of
the sled.

Again, from top to bottom, pass the braided line
through the second pulley wheel of the sled.
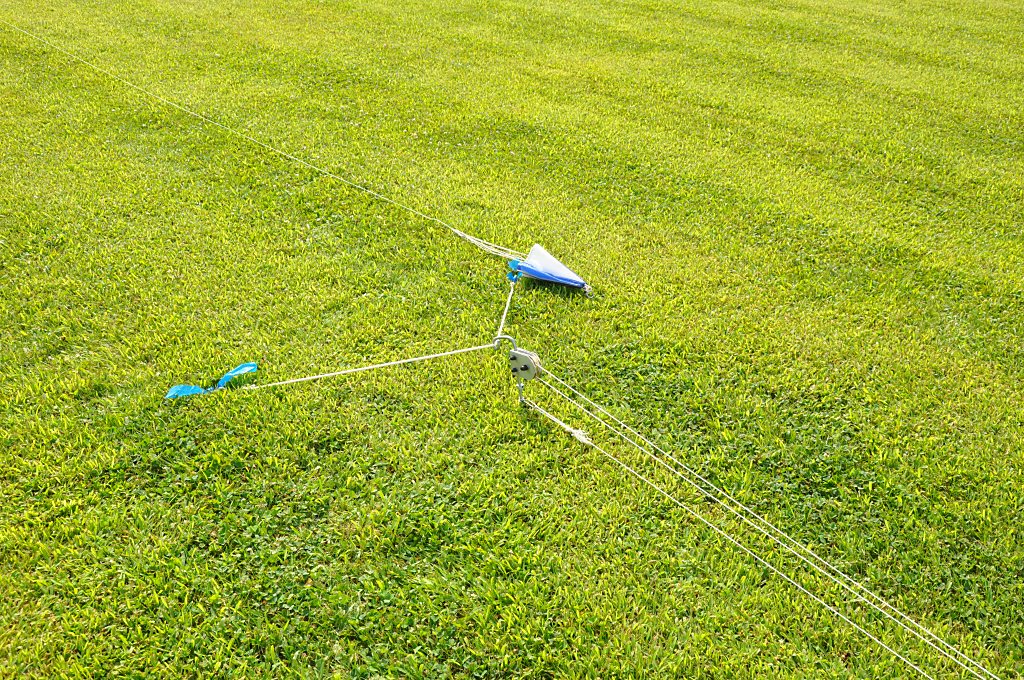
Finally, remove the chute from the Ground Pulley
clip and connect the end of the braided line to the clip.
So we are ready to launch about 9 minutes after
we started.
(It took me several tries to get my rhythm down with the setup, but once you've got the hang of it, it shouldn't take you much longer than setting up your old high-start.)
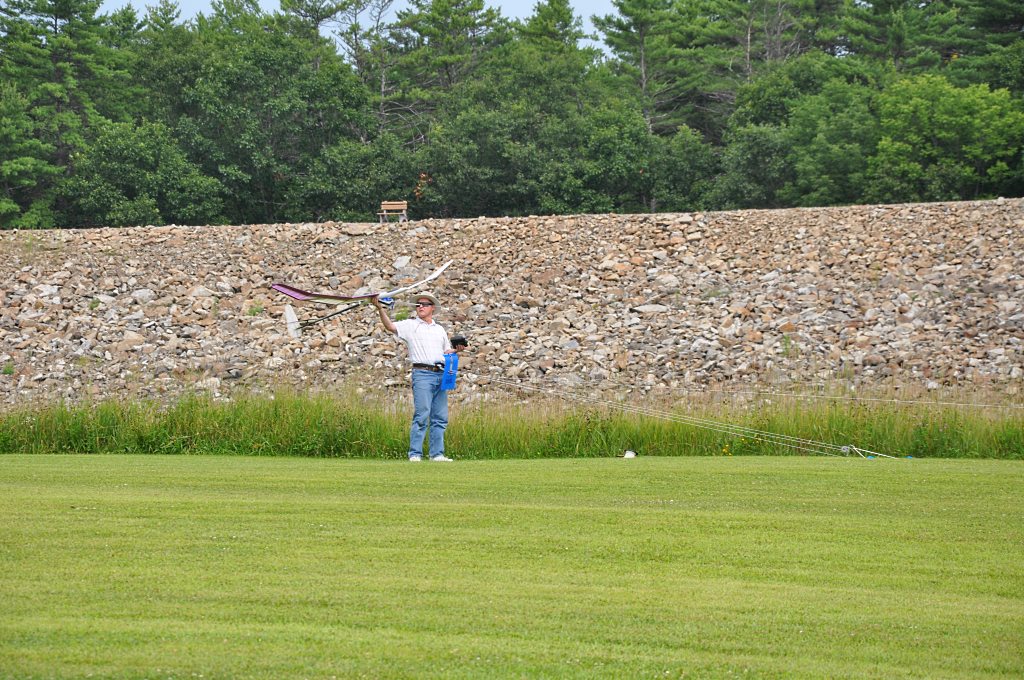
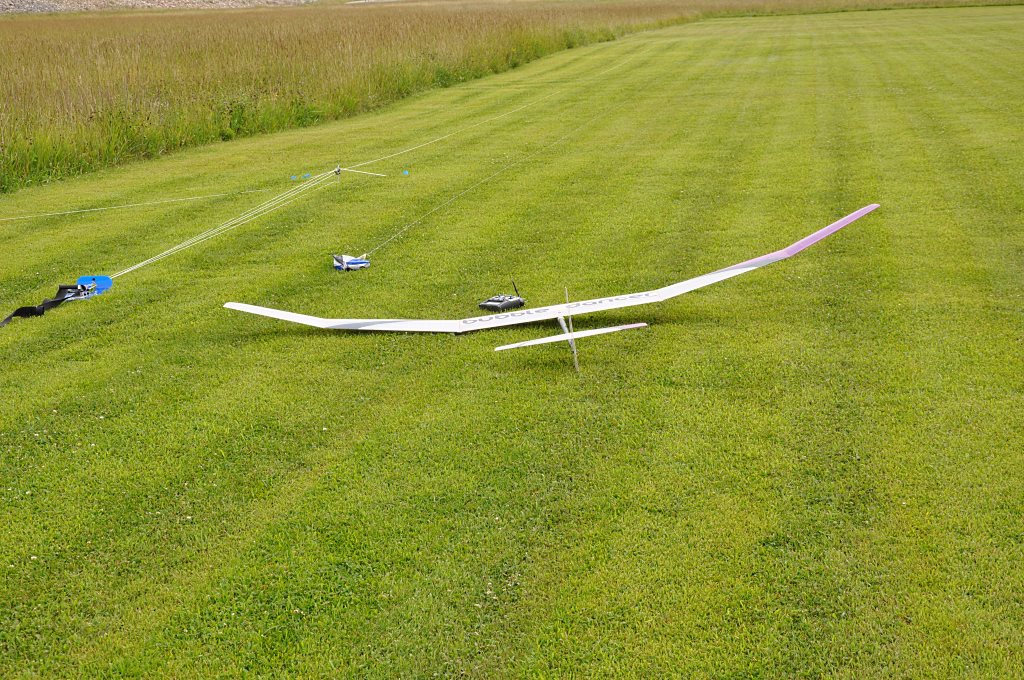
Since I like to hold my glider in my right hand for launch, I have laid out the glider on that side of the sled.
To self-launch, clip the sled's belt around your waist. Make sure that the curved part of the sled is pointing up, and that all the lines exit the sled at a right angle.
(It took me several tries to get my rhythm down with the setup, but once you've got the hang of it, it shouldn't take you much longer than setting up your old high-start.)
Since I like to hold my glider in my right hand for launch, I have laid out the glider on that side of the sled.
To self-launch, clip the sled's belt around your waist. Make sure that the curved part of the sled is pointing up, and that all the lines exit the sled at a right angle.
For me, one advantage the OneWinch has over any
sort of High Start type system is that you don't have to hold full
line tension while in the launch position.
Walk backwards a step or two to tension the line a bit (the monofilament stretches, providing a bit of pre-loading to the line) - this will help you get initial flight speed.
If you need to wait a bit to launch, you can easily remove all line tension by simply stepping forward those one or two paces...
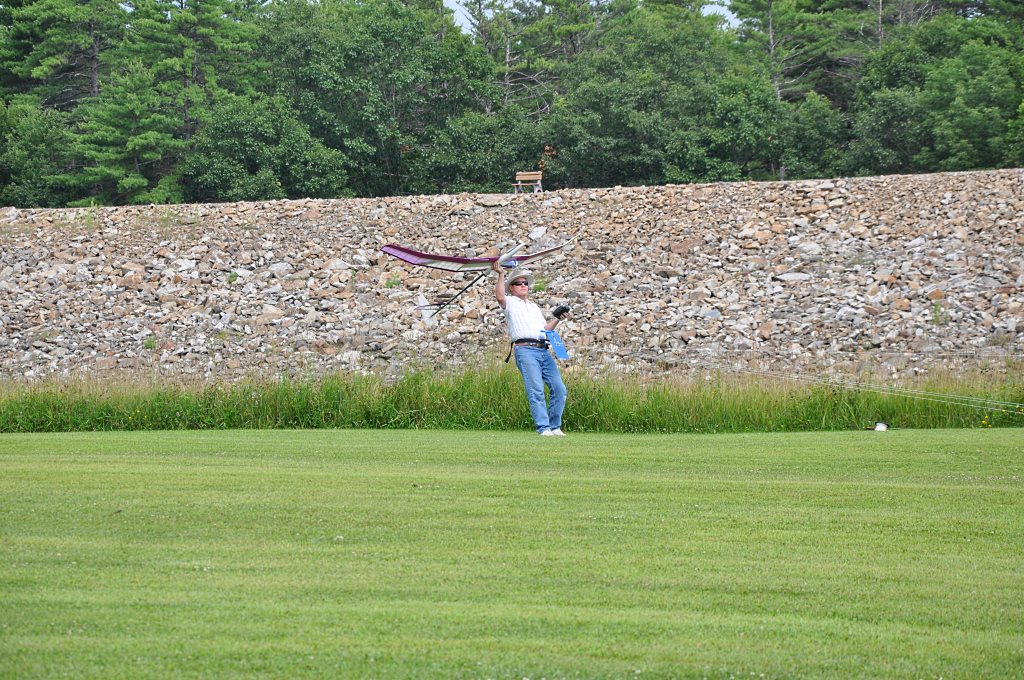
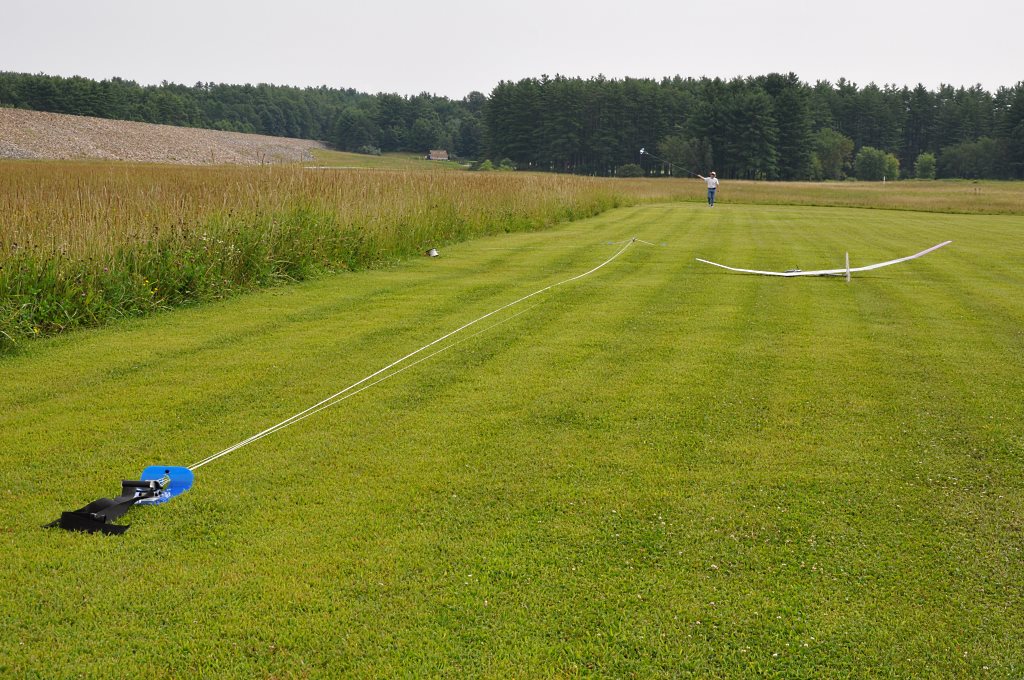
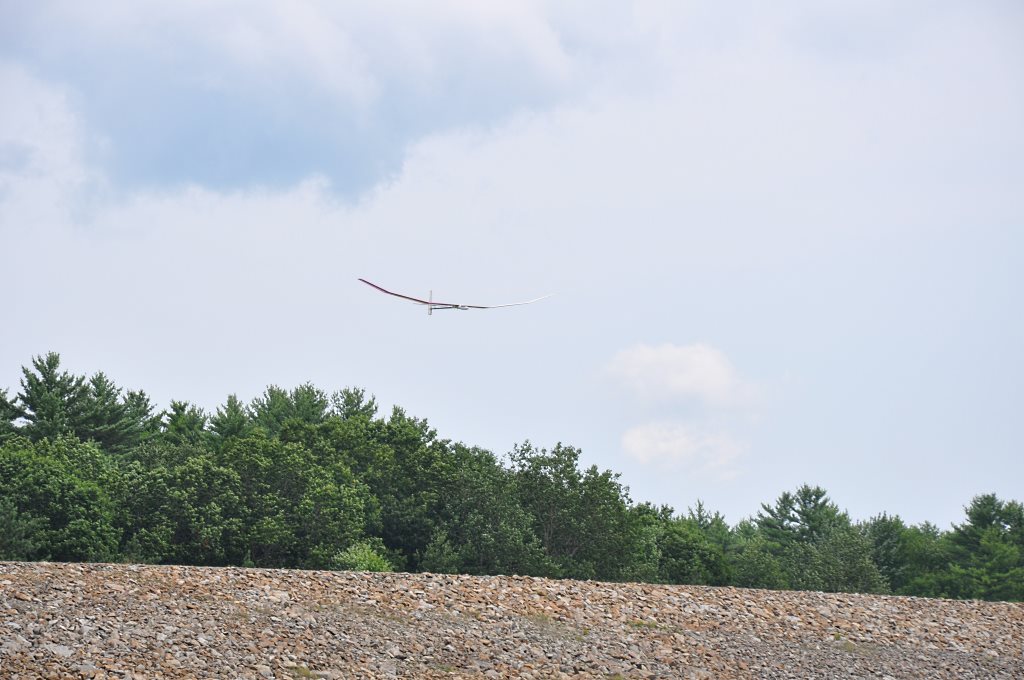
And here we go!
With a bit of a hand-toss to launch, start walking backward to pull the glider skyward.
You do not need to walk fast, nor will you be walking far.
To get a better idea of what this way of launching looks like, check out the video on the GessWork homepage.
With a bit of a hand-toss to launch, start walking backward to pull the glider skyward.
You do not need to walk fast, nor will you be walking far.
To get a better idea of what this way of launching looks like, check out the video on the GessWork homepage.
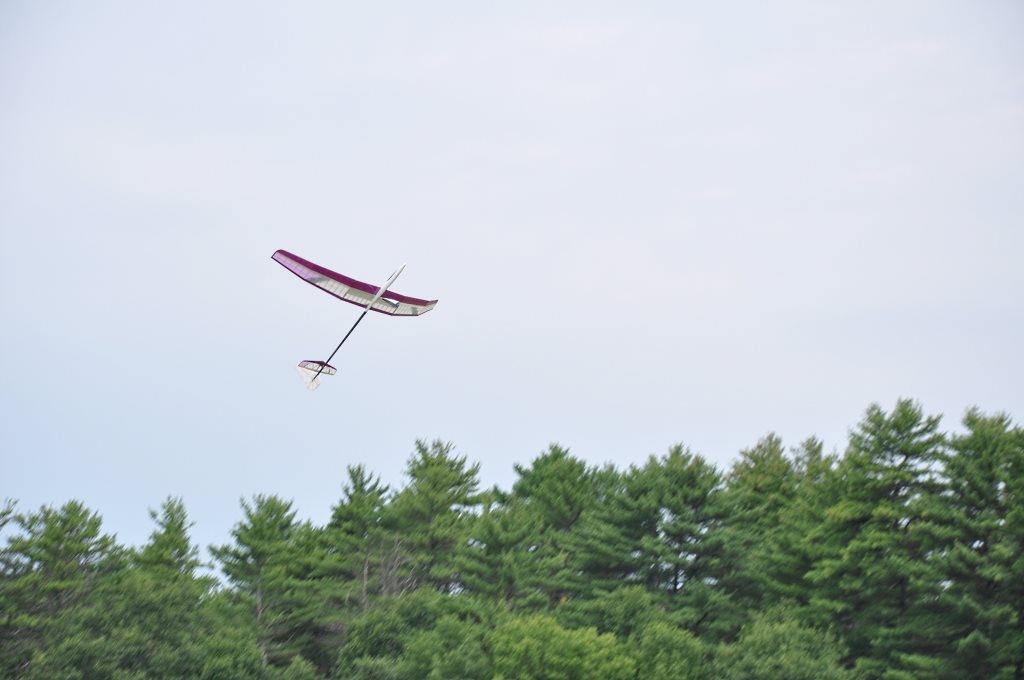
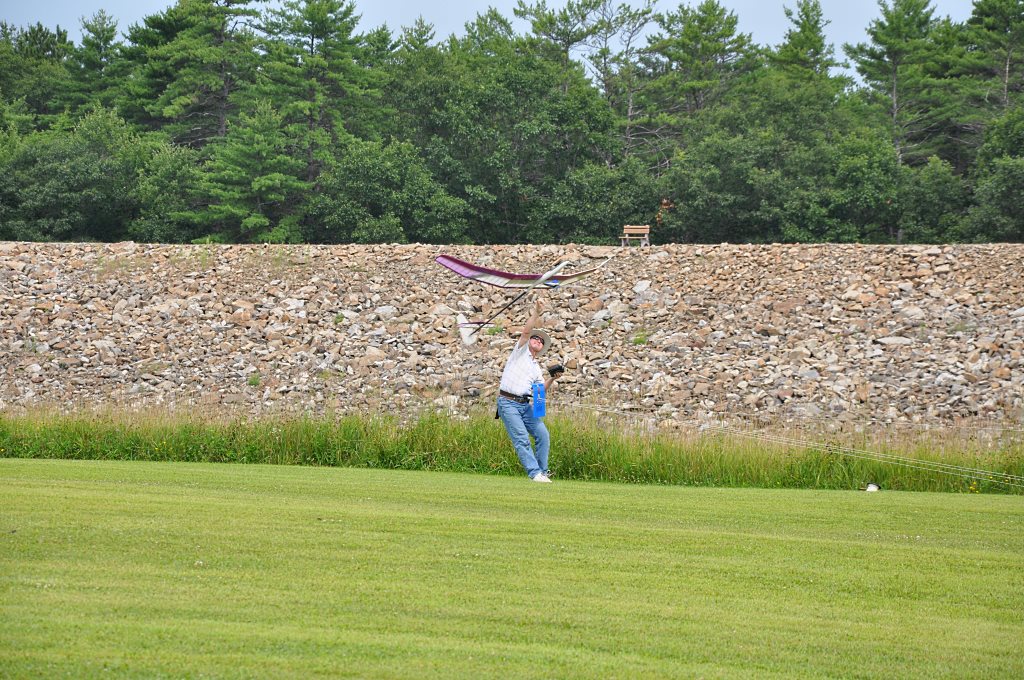
The really cool thing about launching with the
OneWinch, is the real-time feedback that you get from the airplane
as it climbs.
Since you are providing the launch power, you can feel if the plane needs more or less pull (you can even slow down and "kite" it up if you have a bit of headwind.)
If you want to "zoom" at the top of the launch, that is easily accomplished with a burst of speed as you finish.
Since you are providing the launch power, you can feel if the plane needs more or less pull (you can even slow down and "kite" it up if you have a bit of headwind.)
If you want to "zoom" at the top of the launch, that is easily accomplished with a burst of speed as you finish.

Once the plane is off the line, unclip the belt
from your waist to allow you to walk away from the launch area.
To set up for the next launch, first prepare the
sled.
Run the lines through the pig-tail wire at the front of the sled and gently pull the lines straight.
Run the lines through the pig-tail wire at the front of the sled and gently pull the lines straight.
We are ready to retrieve the chute.
In the next three pictures you can see how the retrieval works.
In this shot we see the sled laid out at the spot where our previous launch ended.
In the next three pictures you can see how the retrieval works.
In this shot we see the sled laid out at the spot where our previous launch ended.
Go to where the chute landed and walk it back to
the launch site.
As you walk, the sled will slide forward to meet you back in the launch position. Pretty slick!
As you walk, the sled will slide forward to meet you back in the launch position. Pretty slick!

...and just about ready to launch again.
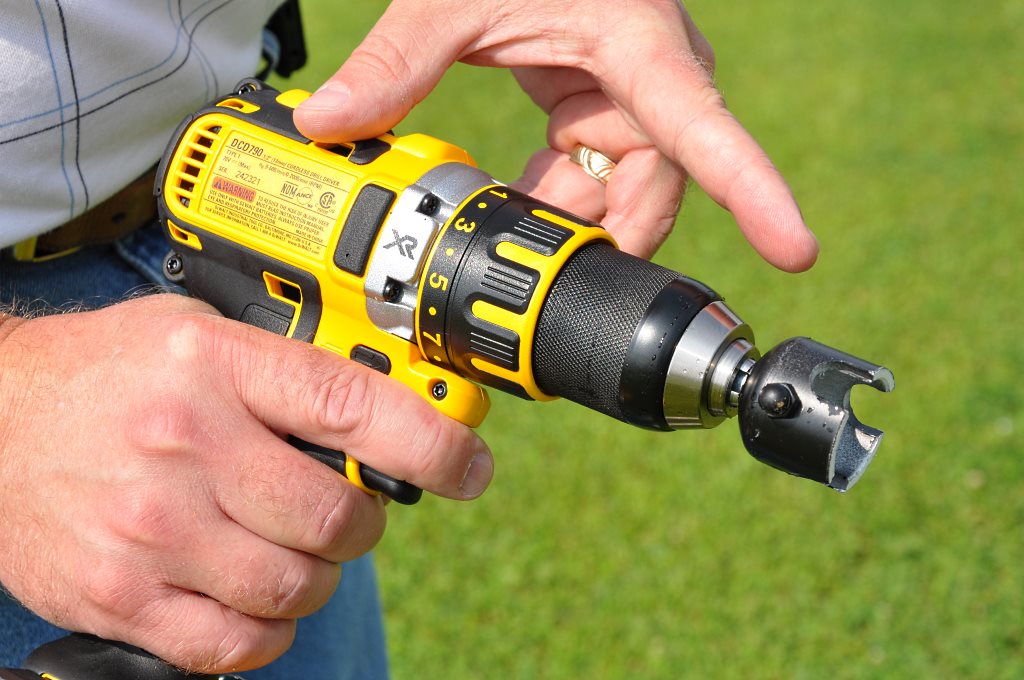
To rewind the line on the reel, the OneWinch
provides a specialized adapter that will connect to your cordless
drill.

Place the adaper into the slots on one side of
the reel, and place the reel's ground state into the hole in the
other side.
Now it is a simple and (relatively) quick process to rewind your line.
Note: An alternative way to wind, is to insert the adapter into the spool right where it sits on the ground. This way the friction of the spool edge against the ground will prevent the line from winding on loose because of backlash.
I'm not sure
I will ever use a Hi-Start again.
With the OneWinch:
I get higher launches than with my Hi-Start.
I don't have to hold full launch tension until I'm ready to launch.
I get feedback from the plane as I tow.
I can zoom at the top of the launch.
Pretty nifty!
* Once again, photography credits go to my son! Thanks!
With the OneWinch:
I get higher launches than with my Hi-Start.
I don't have to hold full launch tension until I'm ready to launch.
I get feedback from the plane as I tow.
I can zoom at the top of the launch.
Pretty nifty!
* Once again, photography credits go to my son! Thanks!