When I shaped my Bubble Dancer fuse plug I did it by hand, but
as I started my latest project, I decided that I wanted to use a
lathe to shape the plug.
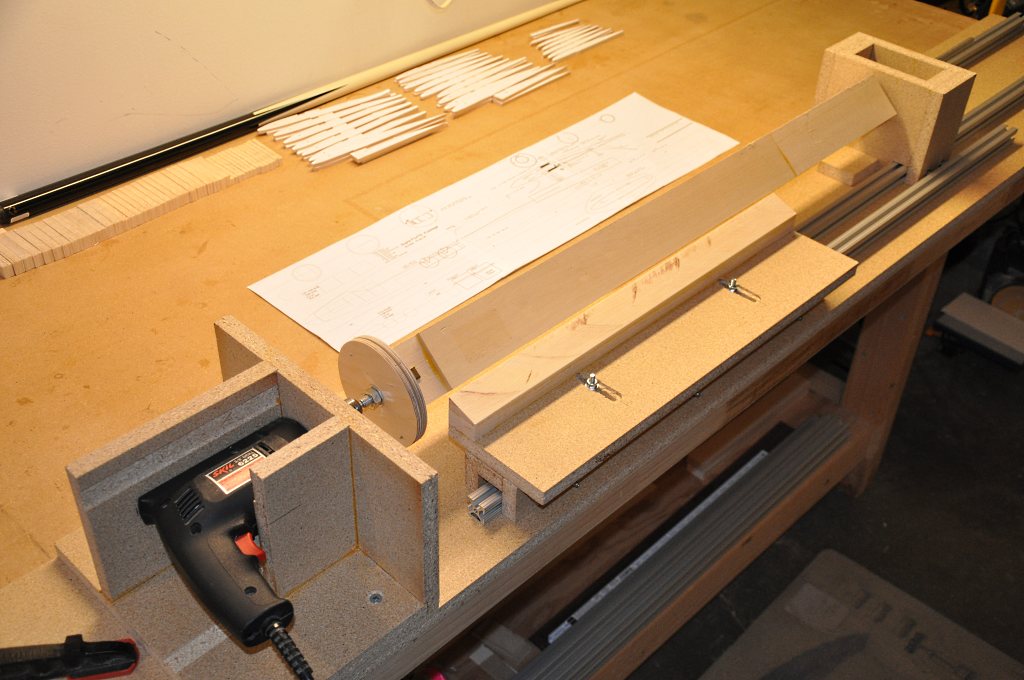
Not wanting to buy a large lathe for just a few such projects, I decided to throw one together from shop scraps and my hand-held drill. I found some "80/20" aluminum extrusions at a local surplus store and mounted them as rails to a particle board. This allowed me to slide the tail-stock to accomodate whatever length of stock I wanted to turn.
I made sure to size the lathe to handle turning the pool-cue boom seen in the background as well! (for Carbon Boom wrapping)
Since I would be swinging potentially large and
heavy blocks of wood, I needed to be sure the lathe was rock-steady.
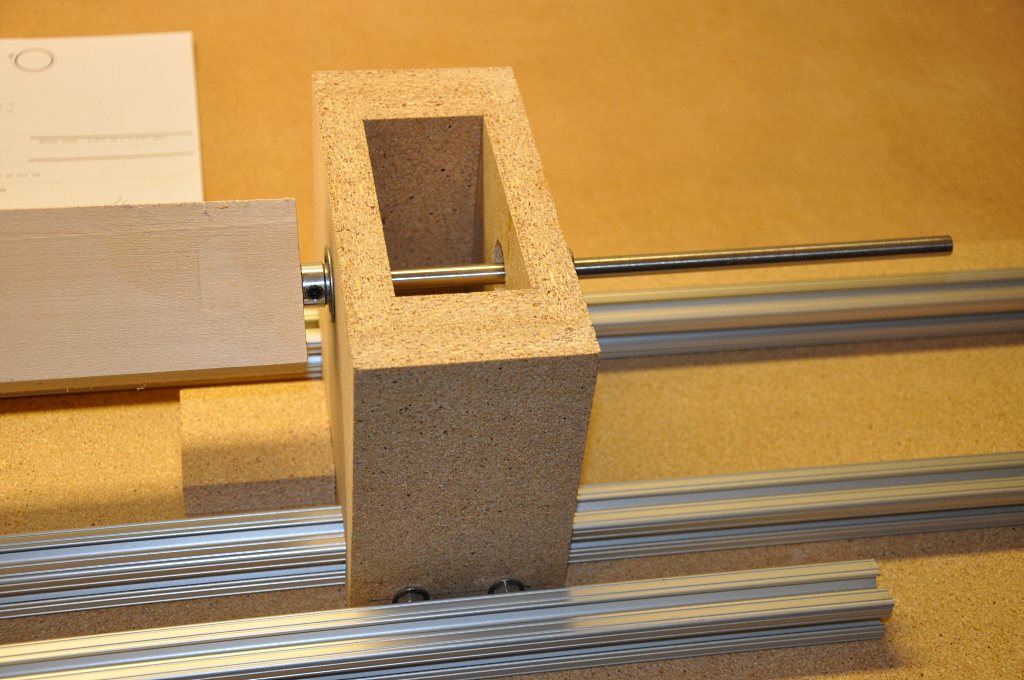
I milled and glued 3/4 inch particle board to make the tail-stock block. I drilled and mounted thrust bearings into both sides of the block and pushed a steel rod through the bearings. I locked the rod in place with collars.
The tail-stock is locked in place to the slide rails with carriage bolts.
I milled and glued 3/4 inch particle board to make the tail-stock block. I drilled and mounted thrust bearings into both sides of the block and pushed a steel rod through the bearings. I locked the rod in place with collars.
The tail-stock is locked in place to the slide rails with carriage bolts.
At the other end I made a holder for the drill
from some more particle board. The drill hole lines up
precisely with the tail-stock center. While not visible in
this shot (see the first picture), the holder is held to the bottom
board with screws.
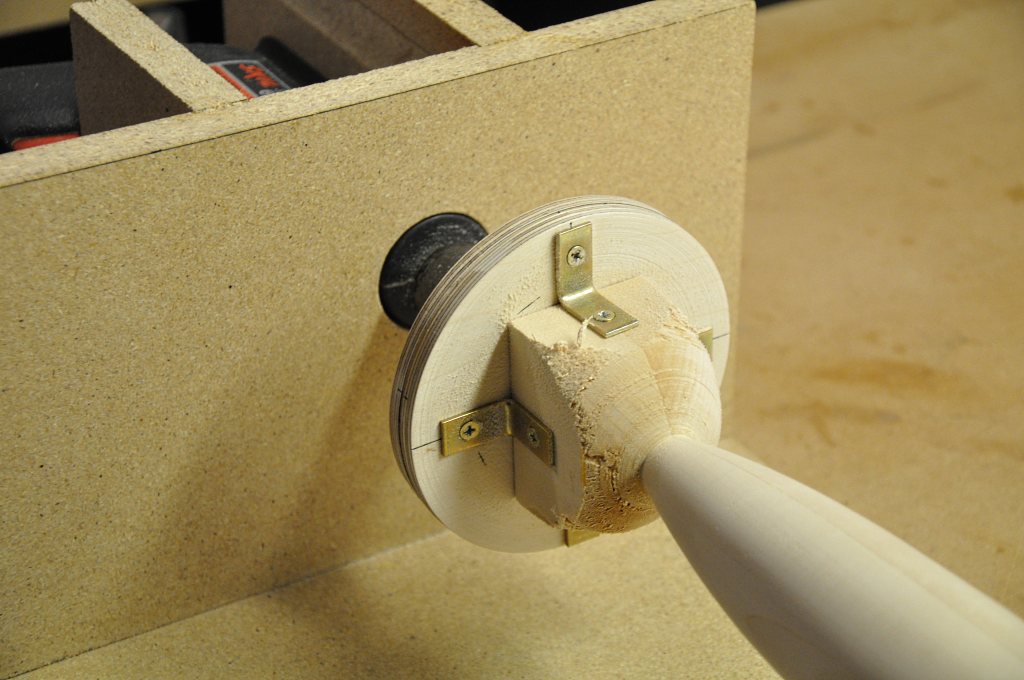
To hold the wood piece to drill bit, I made a simple plywood plate and secured the stock with L brackets and screws. The wood is kept in place by a fairly tight press-fit between the head and tail blocks.
To hold the wood piece to drill bit, I made a simple plywood plate and secured the stock with L brackets and screws. The wood is kept in place by a fairly tight press-fit between the head and tail blocks.
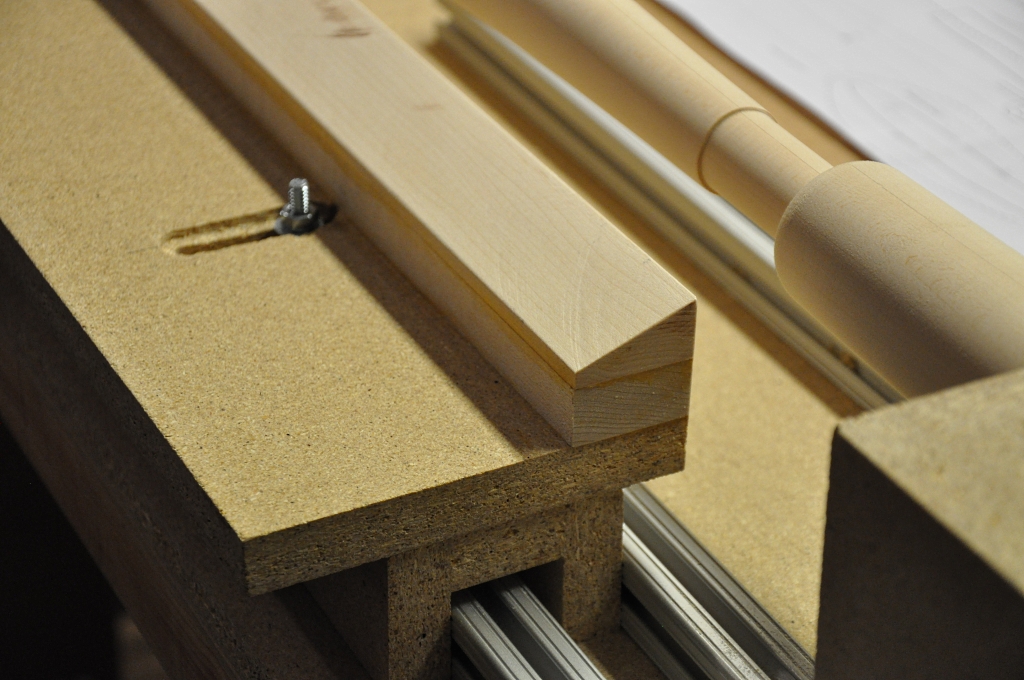
The front rail is a guide for the tool-rest.
It is attached to the rail with the three carriage bolts seen in
the shadow under the tool-rest. This allows me to slide the
rest along the length of the work piece as needed.
The two bolts on the top of the tool-rest allow me to slide the rest up close to the wood stock.
The two bolts on the top of the tool-rest allow me to slide the rest up close to the wood stock.

The tool-rest is made from more scrap particle
board with the exception of the triangular piece that actually
supports the chisels. This piece is made from hard Maple, as
it needs to be tough enough to resist damage during use.
A closer shot of the tool-rest reveals the
sliding rest and the maple support.
You can see that as the work piece gets narrower, you have a need to slide the tool-rest closer to it so that the chisel remains supported enough.
You can see that as the work piece gets narrower, you have a need to slide the tool-rest closer to it so that the chisel remains supported enough.
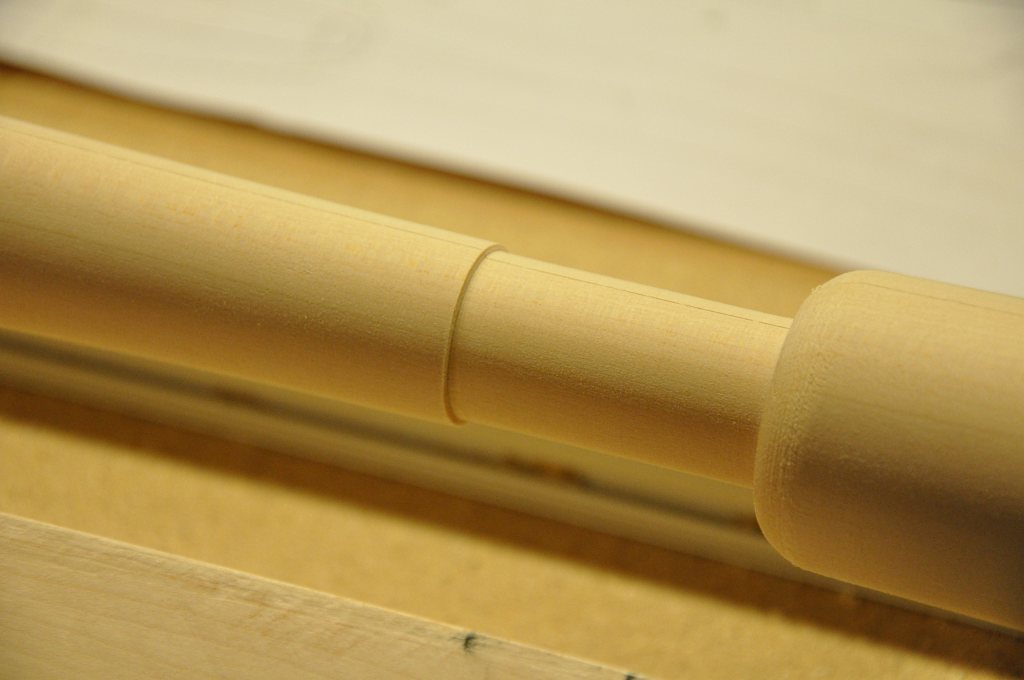
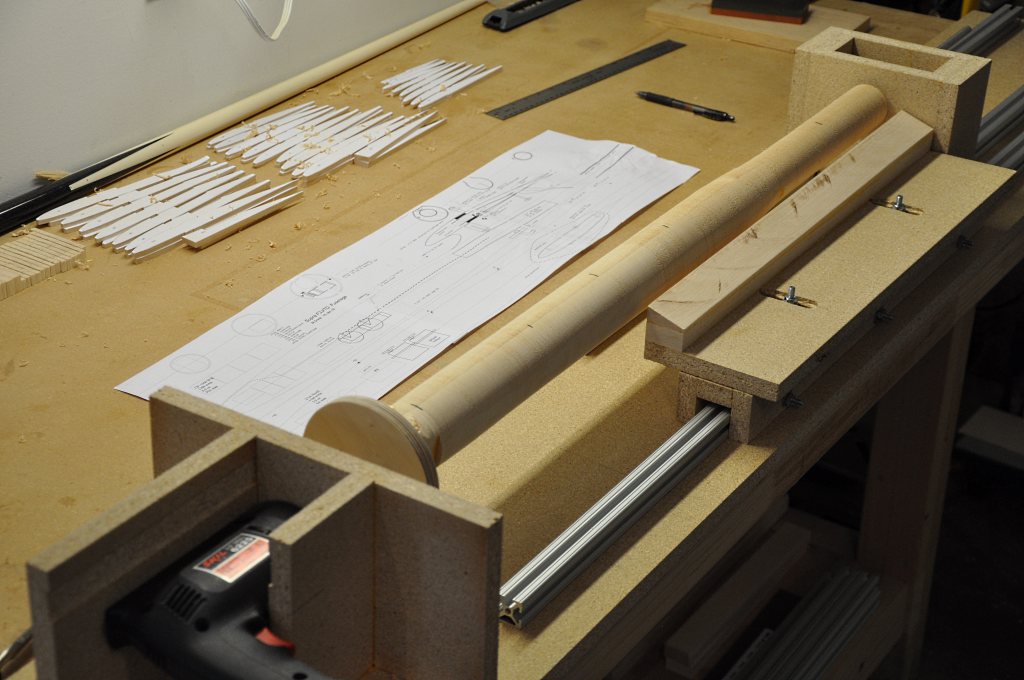
Here we see a close-up of the in-progress plug
work piece.
The step-down is for the boom to slide onto the pod and be flush.
The design of the lathe also allows me to move the tool-rest out of the way so I can do finish sanding with strips of sandpaper.
The step-down is for the boom to slide onto the pod and be flush.
The design of the lathe also allows me to move the tool-rest out of the way so I can do finish sanding with strips of sandpaper.

Once the main work is done, I cut the plug free
from the lathe and finished any shaping necessary. (mainly to
the nose area)
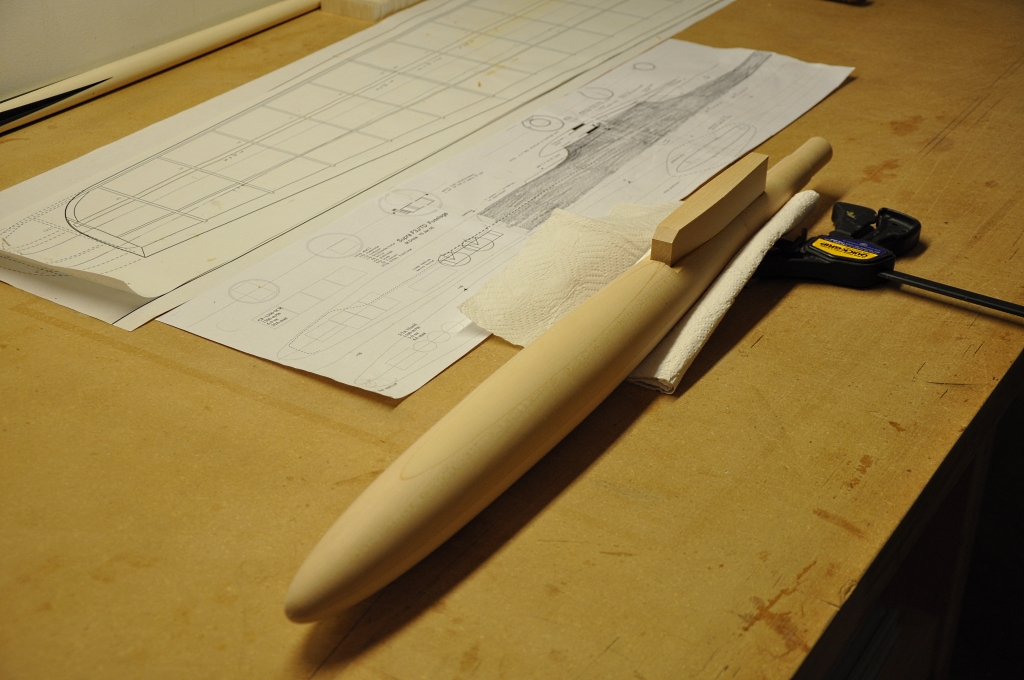
I thought I'd include just a few more shots of
this plug, even thought at this point the lathe is no longer
involved...
I'm making a pylon mounted plug here, so I cut a flat spot on the plug and glued the initial pylon stock to the plug. Then using wood putty, I filled and sanded the putty and pylon to the shape that I wanted.
I'm making a pylon mounted plug here, so I cut a flat spot on the plug and glued the initial pylon stock to the plug. Then using wood putty, I filled and sanded the putty and pylon to the shape that I wanted.
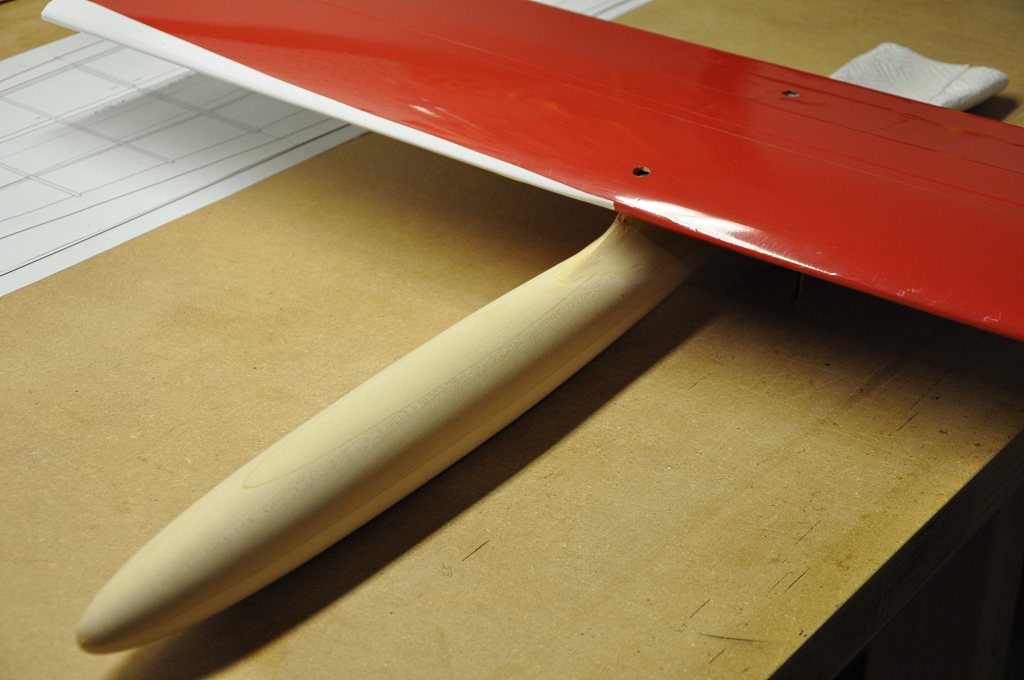
Just for grins, I set my Bubble Dancer center
panel on the pylon to get an idea of the final effect.
All-in-all, not a bad plug made from basswood, using a thrown-together lathe, made from scraps of wood, aluminum extrusions and my hand-held drill: maybe $30 in parts...
All-in-all, not a bad plug made from basswood, using a thrown-together lathe, made from scraps of wood, aluminum extrusions and my hand-held drill: maybe $30 in parts...